Blog Posts

Week 5: Grind-set Mindset

This week, 3Delish is coming off of last week’s QRB hot and ready to get more of the prototype working. Each of the different main teams have been working diligently to further integrate all the different components of the project.

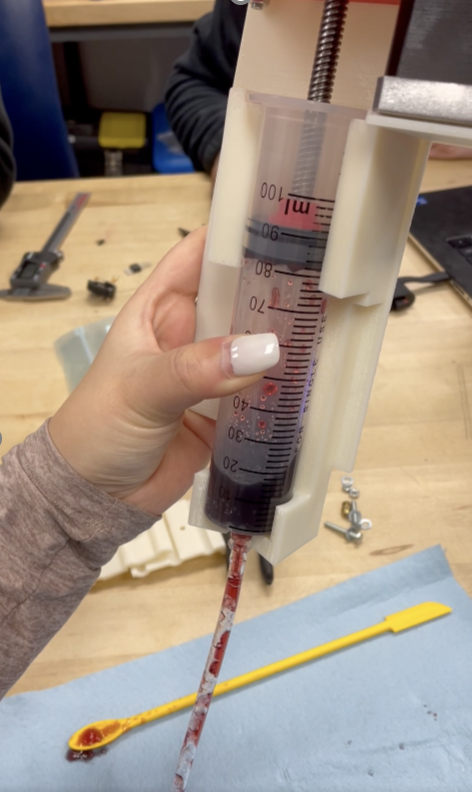
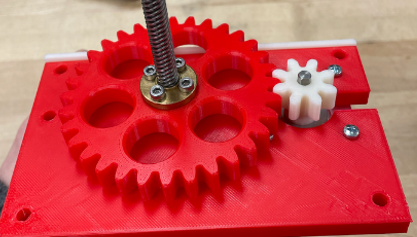
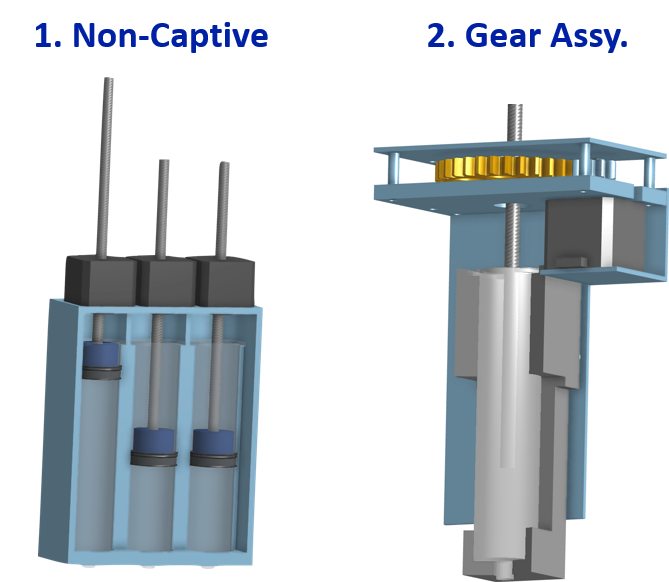
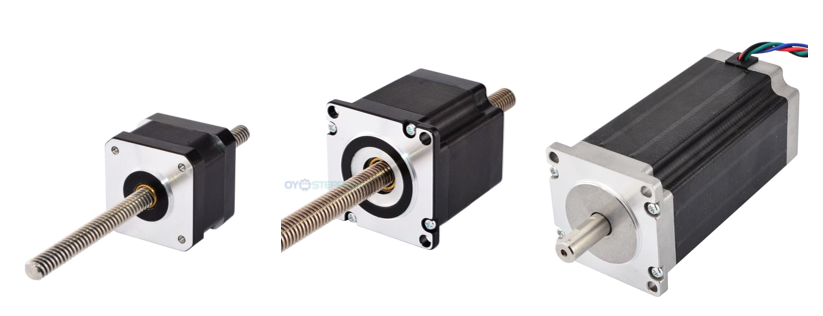
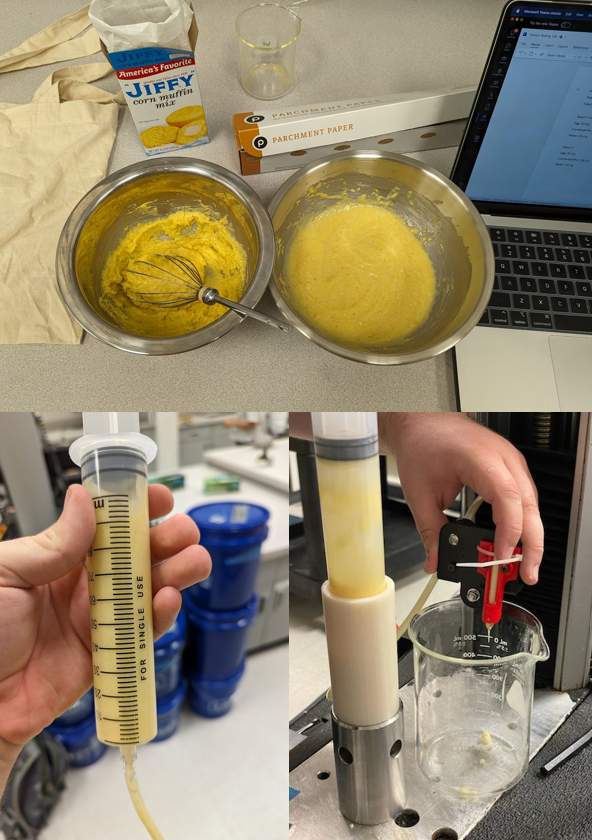
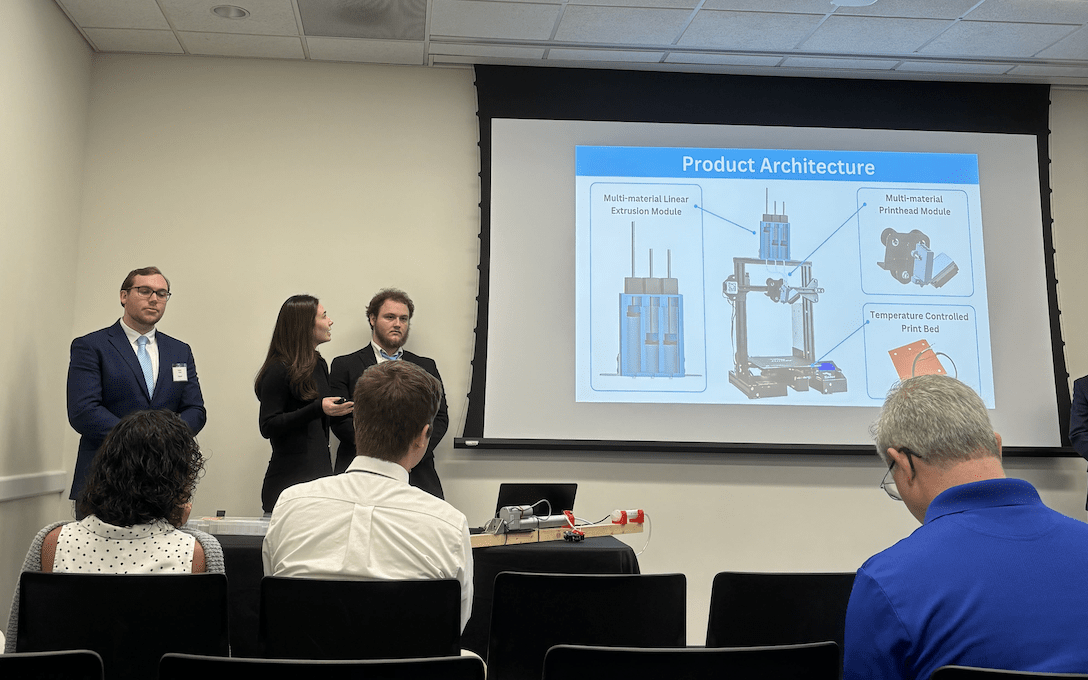
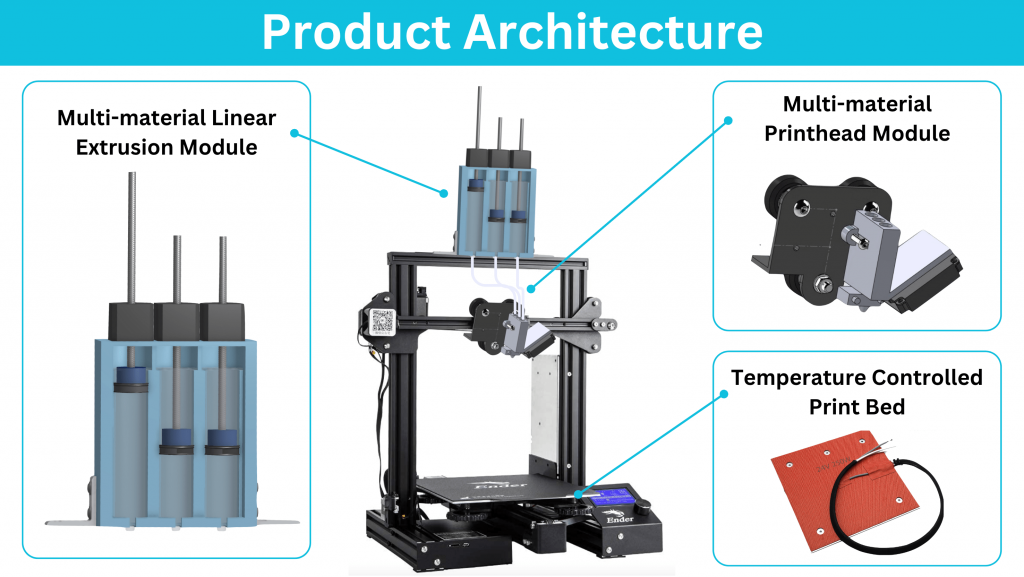
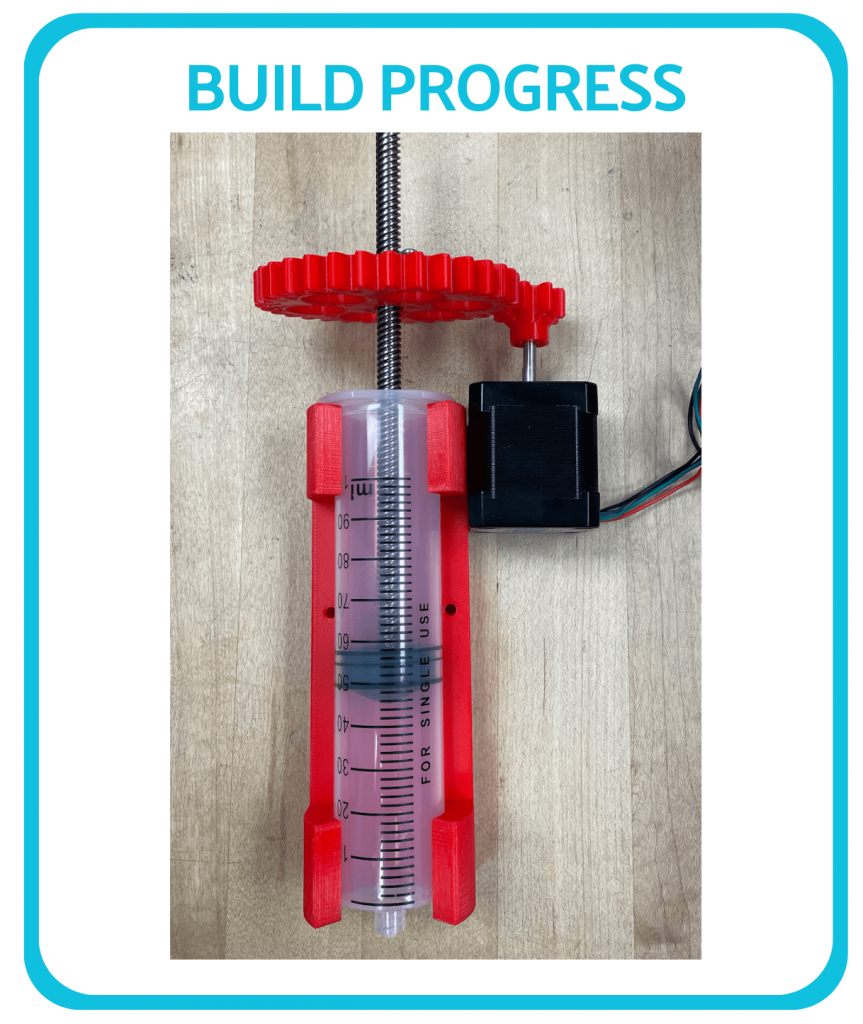
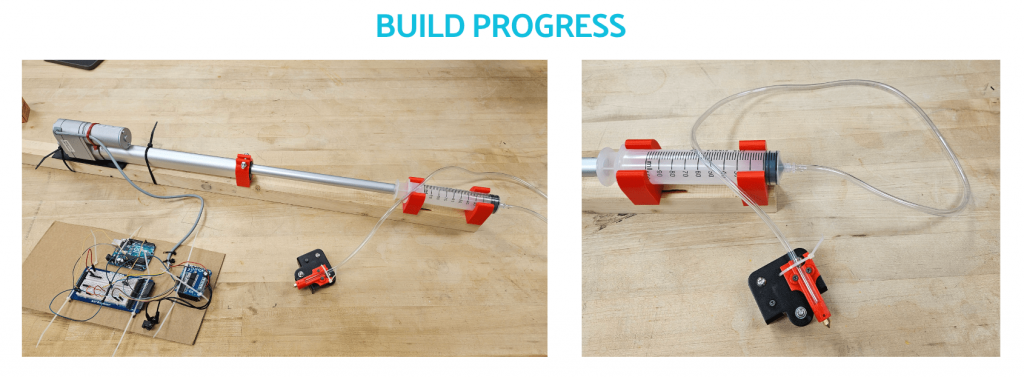
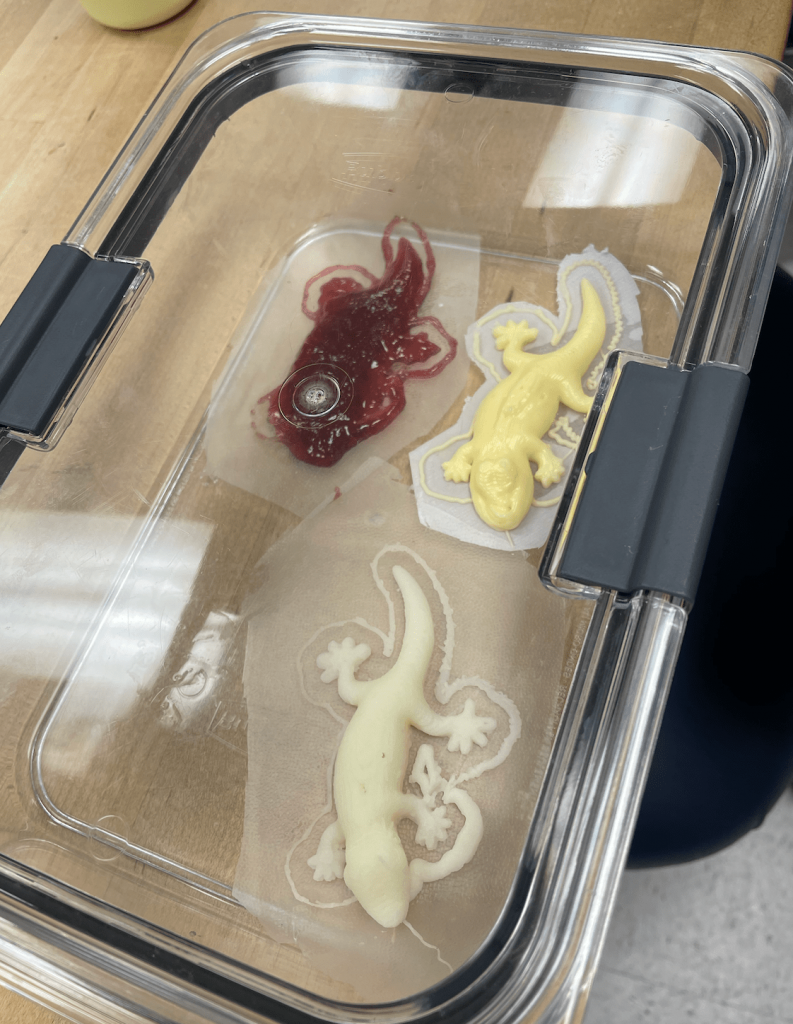
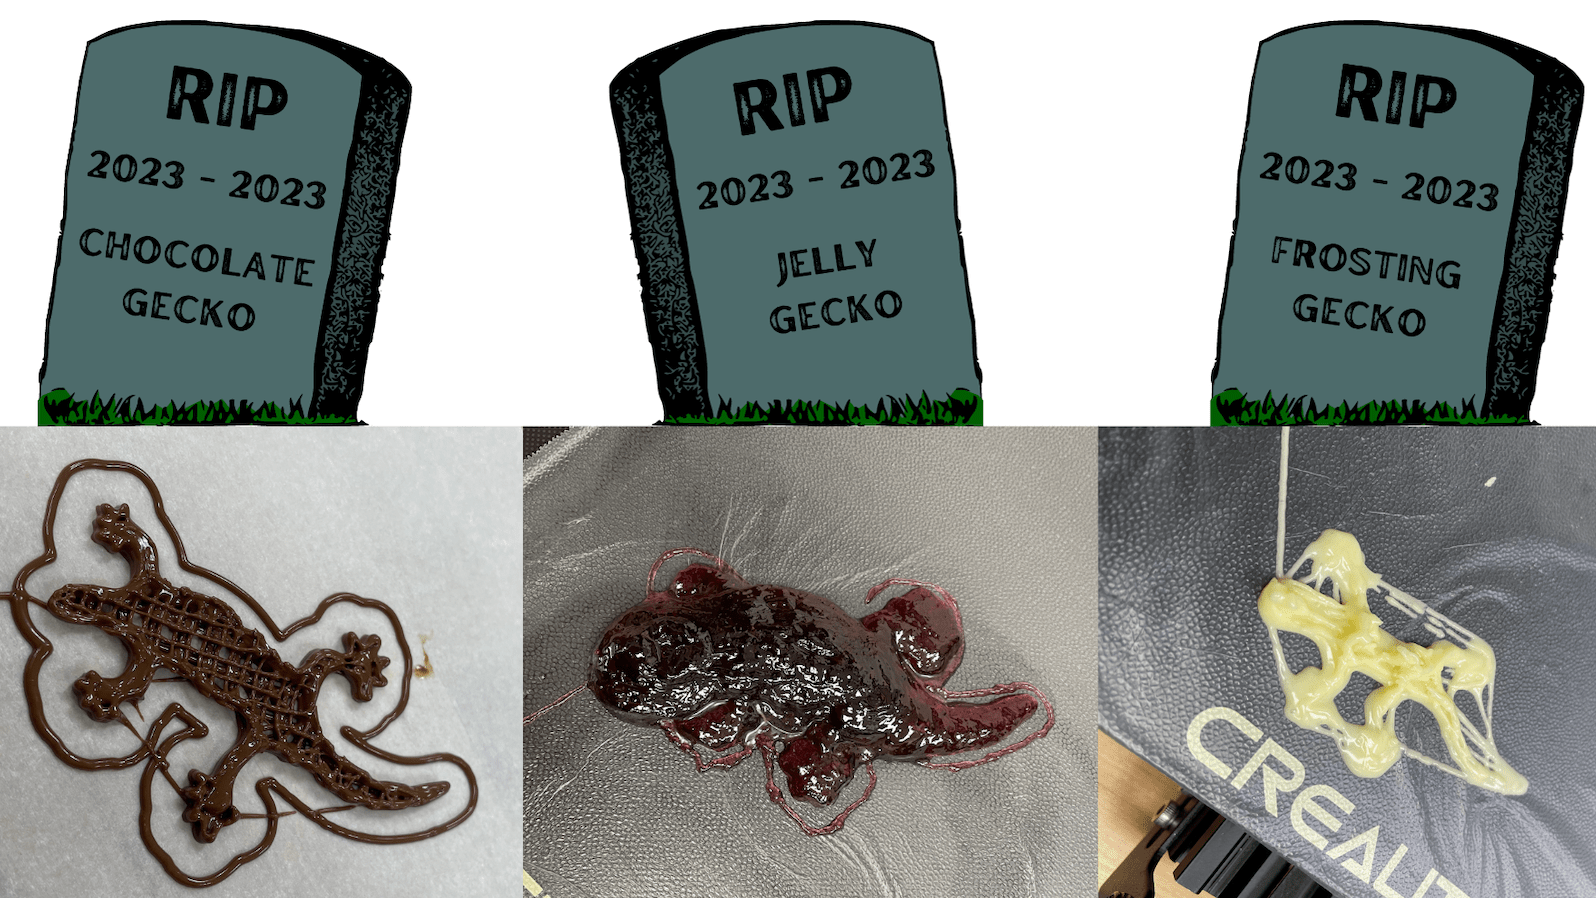
On the extrusion module side, Caylynne was able to finish assembly and began testing the gear assembly version of the extrusion module with jelly inside. The extrusion module team has also been busy ordering and will soon begin testing different non-captive motors.


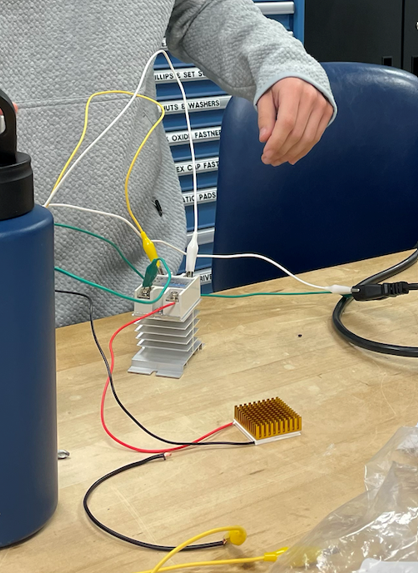
Brittney has taken charge on testing some tubing insulation for the altered temperature requirement prints. Through some basic testing, she was able to show that the insulated tubing was able to keep hot water about 5 degrees C warmer than the tubing without insulation over a 20 minute time span.

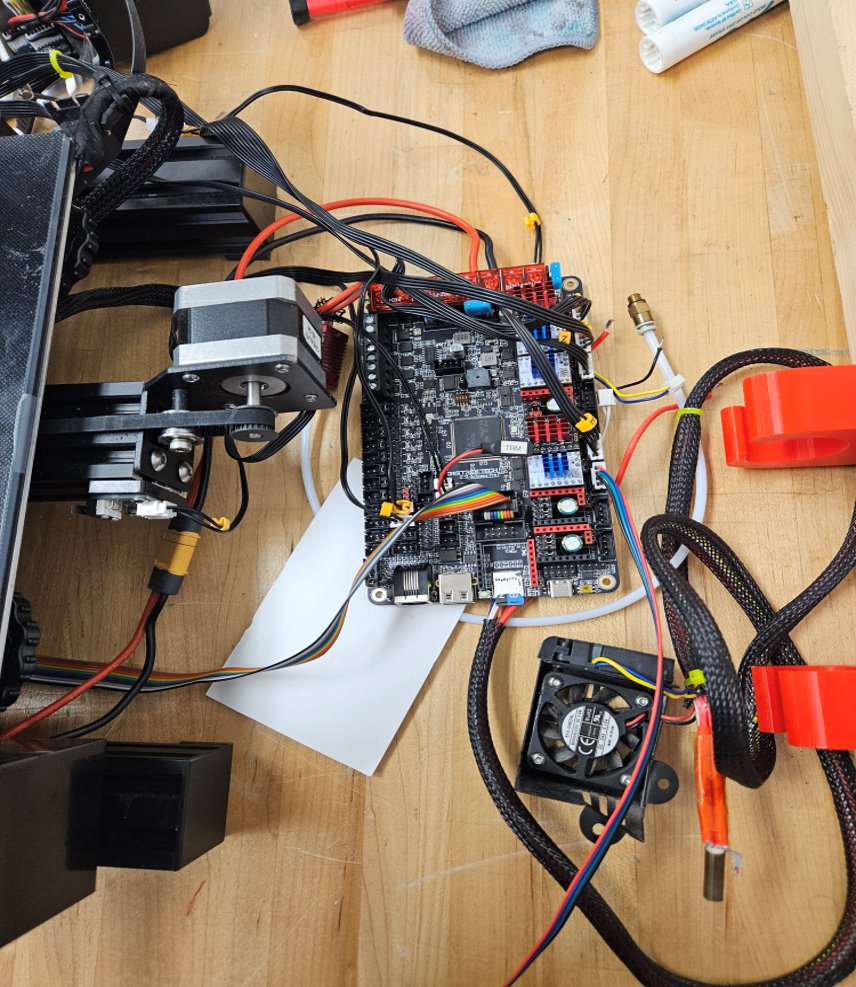
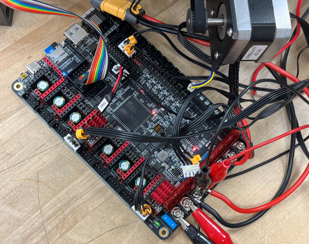
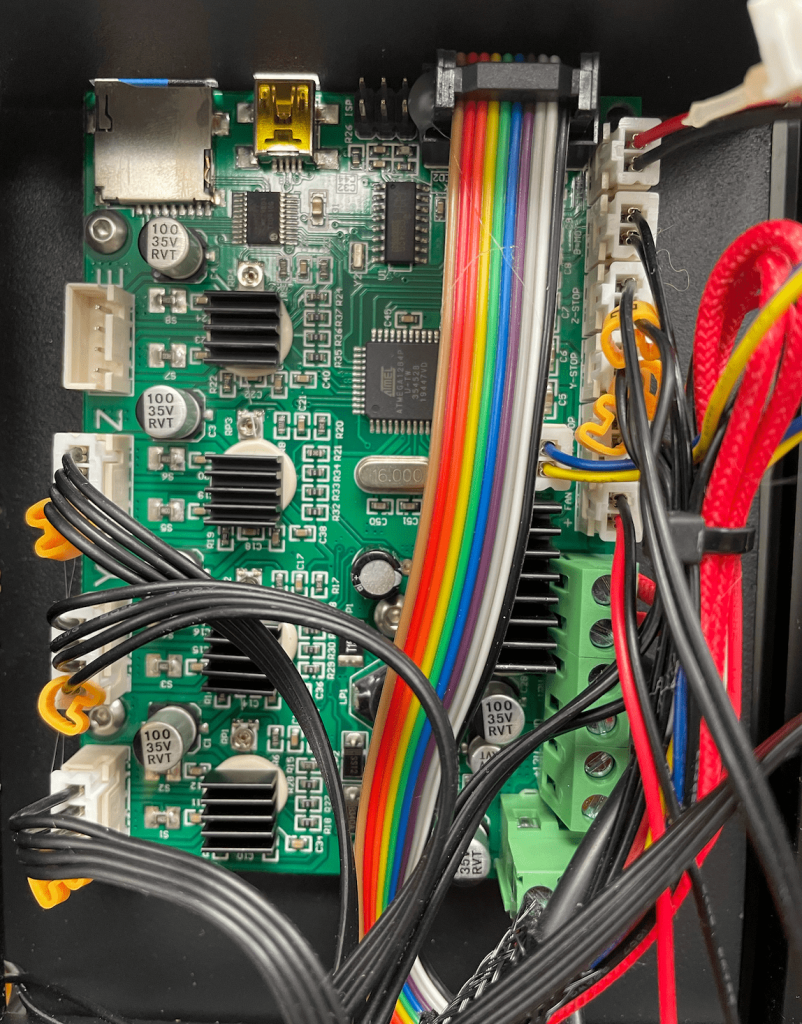
Ian and Andrew have had a bit of a breakthrough with motherboard integration, and are now able to control the motors responsible for the X, Y, Z, E0, and E1 axises. Ian was also able to figure out and interpret the G-code possibilities, meaning we will be able to start multi-material testing soon after we get the extrusion module mounted and integrated.

no bake carrot cake bars.

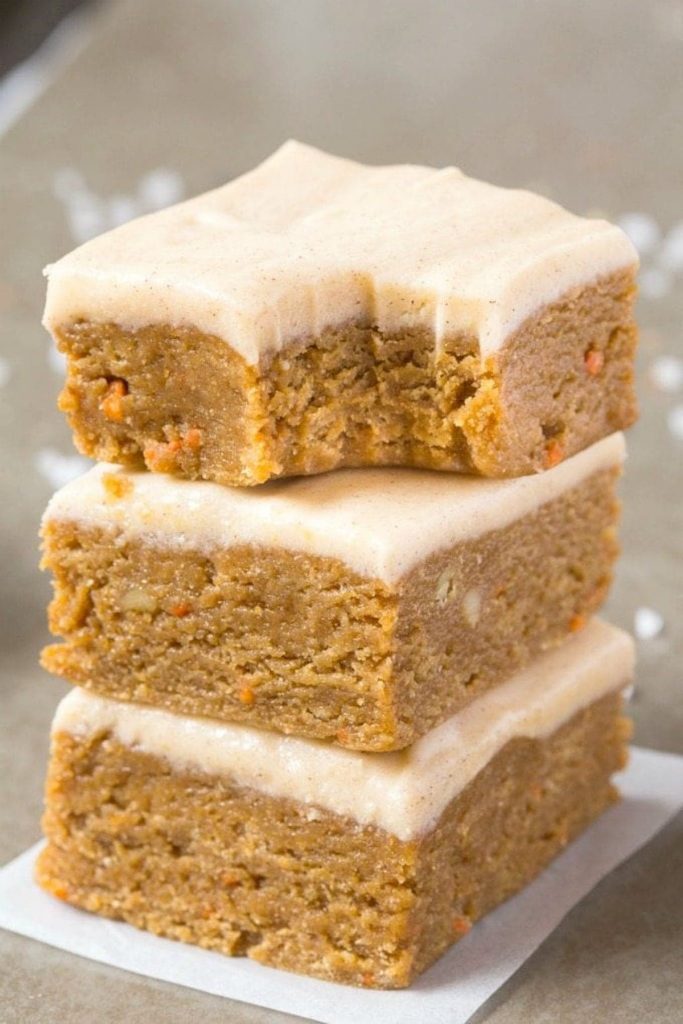
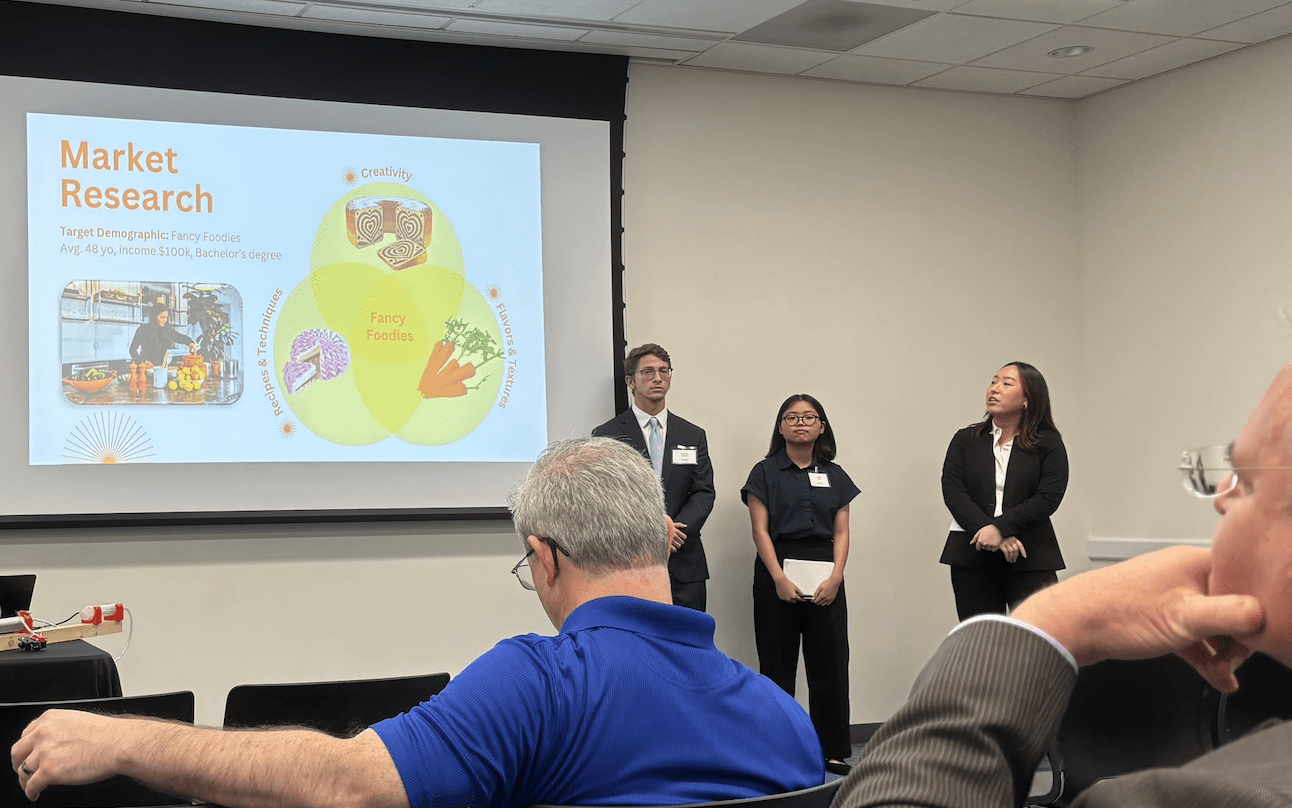
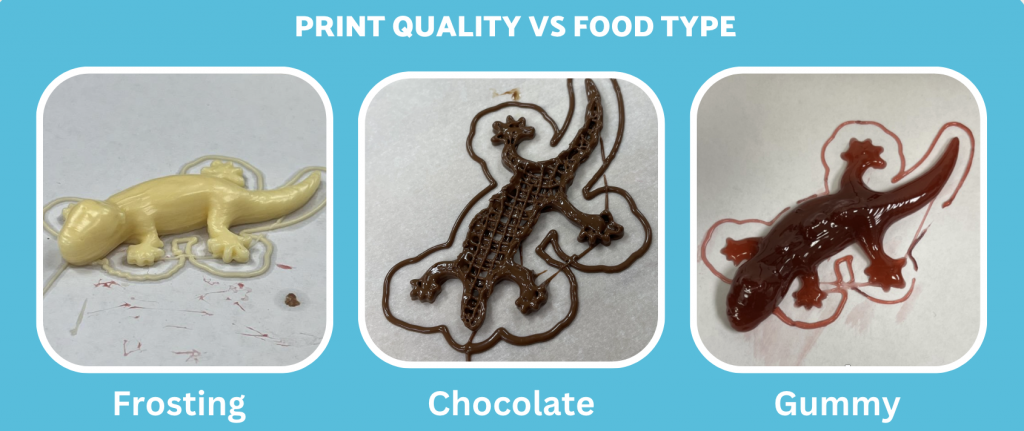
Lucas and Liying have stepped back from Instron testing for the time being now that the maximum force values have been attained, and have turned to researching different food materials they will be selecting for the final design and recipe. One popular candidate is the idea of a no-bake carrot cake bar with base of spiced no-bake cake batter, channels of carrot puree throughout, and a topping of cream cheese icing. Lucas also plans to test some of these recipes at home for the upcoming Super Bowl Sunday, where he has a crew of test subjects to see how these recipes might taste.

The team is excited to continue testing and integrating parts, with hopes to have a multi-material product completed in the next couple weeks!

Week 4: QRB#1

3Delish met with our Quality Review Board (QRB) – the first one of two – on Tuesday! Three IPPD coaches provided their assessments and suggestions on the current state of our project. We received plenty of helpful feedback that we’ll be incorporating into our project in the coming weeks.

One part of the project that appears to be posing a bottleneck currently is integrating the electrical component with the rest. Andrew and Ian have spent time in the lab troubleshooting with new firmware and the display screen. As the separate modules of our printer come together, ensuring that everything can be easily controlled (and with precision) will be important!

Brittney has done some calculations to determine the pressure that our motors will need to withstand, and Caylynne is working on new motors and gears to enhance the printing module. The amount of force required to extrude food differs depending on the material, and new motors will be needed to ensure extrusion happens! Lucas and Liying will continue to test different food materials to determine the best recipes for printing. No bake cakes…? We’ll be using a newly printed fixture (courtesy of Ian) on the Instron machine to improve our mechanical testing methods!

Week 3: Progress on Subsystems & QRB#1 Prep!

Significant progress this week on all three subsystems/subteams: mechanical, electrical, and materials.

First, on the mechanical side- Caylynne and Brittney have been focusing on the extrusion module with focus on choosing optimal Nema motors for best extrusion performance. With three new motors ordered, they will be testing these motors with different step sizes and food materials to down-select on final motors. Two designs of the module are shown below, with the non-captive assembly being the stronger candidate at this time.

Ian has been taking lead in the nozzle printhead design. A 3D printed prototype has been submitted and should be ready for testing soon! Ian is focusing on a 3tube-to-3nozzle design, while Brittney has started to explore a 3tube-to-1nozzle design.

Andrew has been working hard on the electrical side to test our PID controller with the TEC, and moving forward- he and Ian will be focusing on our new Octopus Pro board integration with motor and temperature control capabilities!

Last but certainly not least, Lucas and Liying on our Materials subteam has been working hard on Instron testing and initial food material testing. More results and updates to come!

Week 2: The Build is Heating Up! ðŸ”Ĩ

This week the build progress is heating up as we focus on integrating our PID Controller with the heating/cooling elements for the print bed and chambers. Andrew successfully configured the circuit to work with the TEC element. However, as the sensor is designed to be inserted into a chamber and the element requires a DC input, there are still some tasks remaining before we can effectively control all the components.

Andrew making progress on the PID controller!


From the results of our Instron testing last week, we are also revisiting the current motor specs and overall extrusion design. Caylynne is completing motor calculations to ensure the force delivered is sufficient and the components (3x motors!) still remain under project budget. We see a few pathways forward: maintaining non-captive motor design with just 1 motor to ensure the force required is met for the hardest material, or reverting back to the gear assembly design where we can order less expensive motors and gear up the force applied. Caylynne printed new parts to try out this gear assembly design and experiment with the force required for different foods.

Additionally, the team has finished submitting POs for the majority of the modules. One of the challenges we face is the integration of 3-5x new temperature elements/controllers along with the addition of 3x independently powered motors. After some further research, the team was able to source a motherboard upgrade to accommodate these new motors, and plans to use an expansion board to host the new temperature elements.

Current motherboard on 3D printer

Week 1: Back to the Grind!

Welcome back to a new Semester! We started off strong before classes even began, working on testing materials and gathering data using an Instron machine to get some force and pressure data to inform our decision making. A few of us went into lab over the week to work on that testing as well as take stock of what we have completed and what we are looking at completing in the short to mid term as we get back into the swing of prototype development.

We met with our coach, discussed these goals and assigned individuals to take ownership of those tasks and dates to complete them by. Additionally we are exploring various project management programs and ways to more easily track the status of key project milestones. The ever present issue of scheduling once again reared its head as we try and find workable times for all of us to meet consistently and coordinate, not just within the team but with our coach and liaisons. Hopefully as schedules settle down we will be able to resume our weekly meetings with all stakeholders.

We are looking to have some more exciting build information coming in the next few weeks, so keep a lookout for those pictures and information as soon as we have it!

Ian(Left), Lucas(Right), and Liying(photographer) hard at work during our first Instron testing session this week.
(1) Andrew setting up a PID temperature control device (2-6) more experiments using the instron and a custom made syringe fixture.

Week 13: System Level Design Review 🎉

This week 3Delish completed our final presentation of the fall semester — System Level Design Review!

3Delish at IPPD System Level Design Review!
Left to Right: Andrew Motzer, Liying Wu, Brittney Pohl, Lucas Avery, Caylynne Teem & Ian Cook

The team has been hard at work incorporating final design changes, addressing previous feedback concerning temperature control/user maintenance, fleshing out the user process, & preparing for the SLDR presentation.

Brittney describing the Market Research & Target Demographic
Caylynne walking through the overall Product Architecture

The team delivered a great presentation and received positive feedback for the progress of the design as well as all of the business case, maintenance, & experimentation progress included!

We’ve also prepared a Gantt Chart for spring semester to plan out our physical build, integration, print optimization, & prototype verification. For spring, our team will be focused on building/integrating the 3 main modules: Linear Extrusion, Printhead, & Print Bed. All of these modules have their own temperature control elements so a large focus will be in integrating these additional components to the existing printer motherboard and creating a breakout board for the remaining components. In addition to the physical builds, our team will also be developing a user interface to allow users to enter appropriate inputs if they are creating a print with multiple materials.

In parallel to the physical build and user interface integration, the team also will be testing material properties and printer parameters to optimize the quality of the print. From our fall experimentation, we understand that material properties and printer settings can have a large impact on the resolution of print especially in finer details, so these lessons learned will be important in delivering a final user guide/recipe book to the consumer.

Before we head on to winter break, the team will have one final meeting to discuss final design considerations and order all the components necessary to hit the spring semester running.

Happy Holidays from 3Delish! ❄ïļ

Week 12: System Level Design Review Prep!

Returning from the Thanksgiving break, 3Delish has been prepping for our upcoming System Level Design Review. This past Tuesday, the team presented to a peer audience and has been since incorporating this feedback to polish our final presentation of the semester.

Some of the new changes implemented by the team include Caylynne’s re-design of the Extrusion Module to accommodate the printing of multiple materials and thermal components. Ian’s re-design of the Printhead Module also focuses on the incorporation of the multiple materials as well as temperature control via the heat cartridges and fan.


A priority for the team in the coming weeks will be the integration of these additional components in to the existing motherboard or via a capacity expansion board. There is also some designing required for the additional user inputs expected as a result of having 3 different materials to print. The user must then assign the materials and respective temperatures to the nozzle numbers in the user interface.

Stay tuned to see more of our build progress in the spring semester!

Week 11: 🍂 Happy Thanksgiving from 3Delish! ðŸĶƒ

As we approach the fall break, team 3Delish would like to wish everyone a restful Thanksgiving! See below our print of a turkey with our new Tubing Delivery System prototype:

Week 10: Prototype Inspection Day!

This week our team presented our 2 proof of concept builds alongside the results of our printing experimentation during PID! Prior to this event, the team has been busy in the lab printing with the LuckyBot printer module to understand both the affects of material properties and printer settings on the quality of the print. Check out some of our results in experimenting with different food materials, temperature, & printer parameters. 

In addition to the experimentation with different food types, our team has been focusing on developing 2 proof of concept builds. The first design, created by Caylynne & Brittney, is the Linear Extrusion Module. This is a common extrusion method for syringe based printing and would serve as a direct replacement for the LuckyBot.  

The stepper motor drives motion through the gears and facilitates the rotation of the leadscrew which serves as a plunger to expel the food out of the syringe. There is a plate on both sides of the gear assembly to ensure that the gears are constrained and only able to rotate. The tool plate on the chamber backside allows for the entire assembly to be able to roll on the X-axis gantry. 

The second design, created by Ian and Andrew, is the Tubing Delivery System. This design currently utilizes a linear actuator to press the syringe and dispel the food material. This food is then delivered via tubing, to the printhead. This design reduces the weight actually on the printhead, and allows for food storage off of the printer gantry. 

Throughout PID our team received great feedback for the experimentation the team accomplished as well as the viability of the Tubing Delivery System prototype. We also received suggestions to further explore the temperature control systems for each prototype, disposable syringes (biodegradable) to reducing cleaning/set up, and to further understand the material properties through characteristics like shear thinning, viscosity, density etc. 

This Friday, Ian, Caylynne & Brittney worked in the lab to additionally test the Tubing Delivery System with frosting & connect the Linear Extrusion motor to the Ender motherboard. Here are some of the results from the Tubing Delivery System!

Tubing Connected to X-Axis Carriage
Finished Gecko Print with Frosting via Tubing

Week 9: DOE Crunch Time 💊

This week the team is preparing for upcoming Prototype Inspection Day. For our installation we plan to have 2 builds for different delivery methods of food extrusion, a live running demo of the off the shelf LuckyBot module, video compilation of the prior prints in lab, as well as all of the food prints we have completed with different food materials.

Geckos ready for PID!

For food, we are printing with: Mashed Potato (Instant Mix), Frosting, Jelly, Chocolate, Butter, & Fruit Gummies. We also tried printing with a crust mixture (Food Processed Crackers + Butter) to mimic that of a cheesecake crust; this mixture however, was too thick to be extruded.

The DOE is intended to display the results of print quality across a wide variety of foods with different rheological properties, as well as different printer settings. Some foods are more dependent on temperature, such as chocolate, and others are more dependent on consistency (wt %) like mashed potatoes. In terms of printer settings, we can alter things like the retraction distance or z-hop to help increase the resolution of fine details in the print and reduce stringing that happens in the print as material is still extruded in the travel steps.

The goal of our DOE is to understand the optimal food preparation parameters (temp, wt %, etc.) as well as printer settings (flow rate, retraction, etc.) so that we can have the material performing well as we develop our own extrusion module.

In this process, we have come across a lot of unsuccessful prints. Please pay your respects to our Print Graveyard below, RIP ðŸŠĶ.